How to install Magento 2
How to install Magento 2 – This tutorial is for Magento beginner developers to install Magento 2 successfully. Firstly, we will download the files from magento.com and secondly, configure the setup wizard successfully. So, open the new tab and type https://magento.com and press enter. Hover over the community menu and click on the documentation and resources link below the developers’ section. It will redirect you to the documentation and resources page, on the top right side of the menu click on the download section.

On the download page, you will see three tabs download, release archive, and how to get started. Click on the download tab and click on the Magento 2.2.2 version. To download the source code you should have an account on that site. Please create an account and click on the download.

Now, copy and paste the magento files into the htdocs folder which is located in (MAMP/XAMPP) folder.
Following steps to install the Magento
There are 7 steps. Please follow each and every steps to run the application on your system.
Step 1: Go to phpmyadmin, and create a new database namely magento2 or any other name.
Step 2: Go to a new tab, and enter http://localhost:8888/magento2, that page will display a setup wizard and
we will need to configure the database, store, and user information. The setup wizard page looks like the below image.
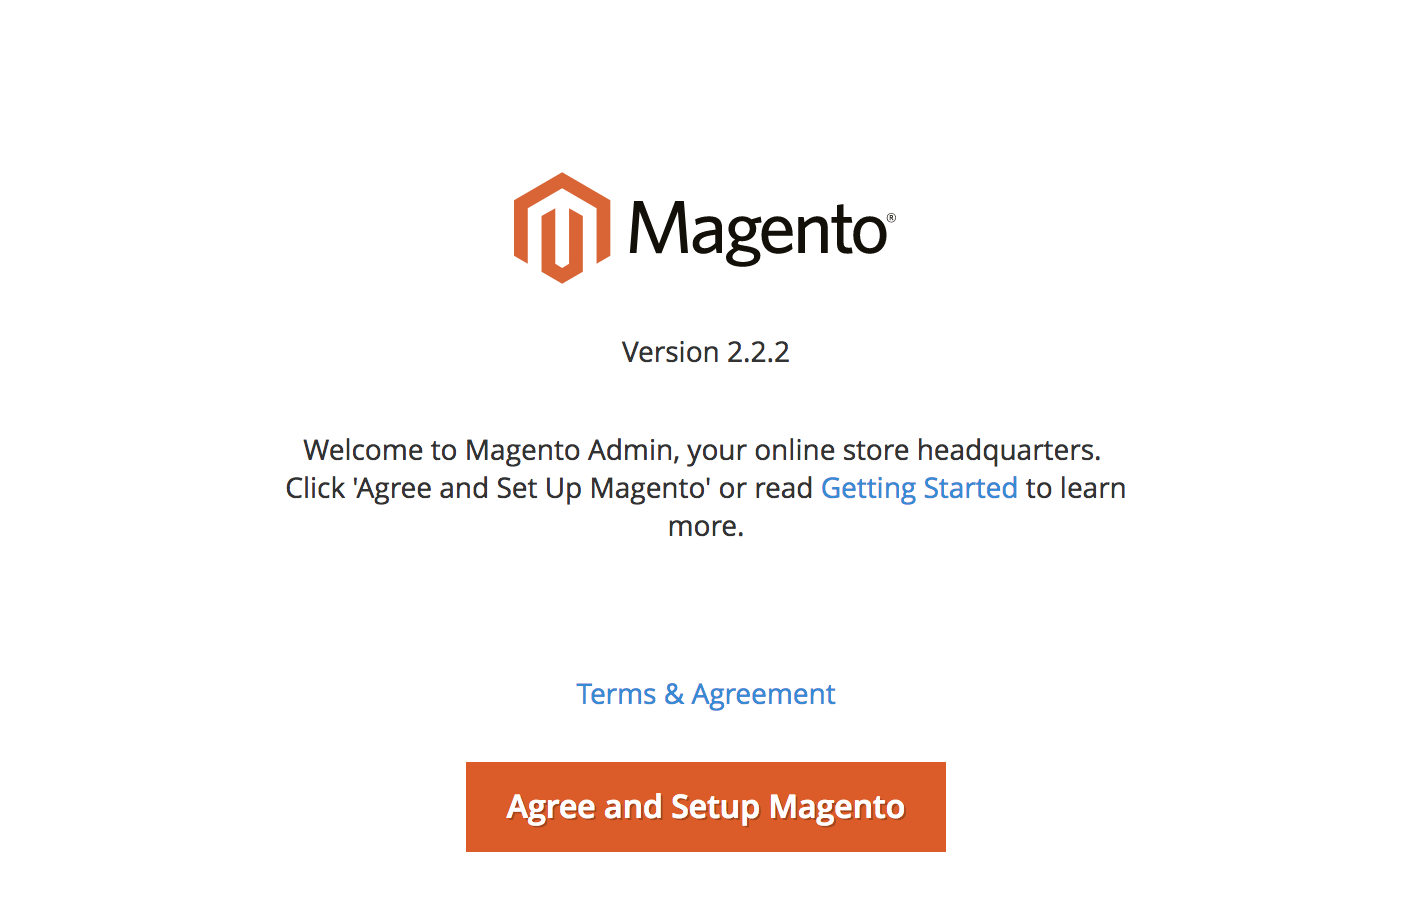
Step 3: Click on “Agree and Setup Magento” button. After that click on the “Start Readiness Check” button to check the environment like PHP version, extension, compatibility, and permissions. Click on the next button on the top right side
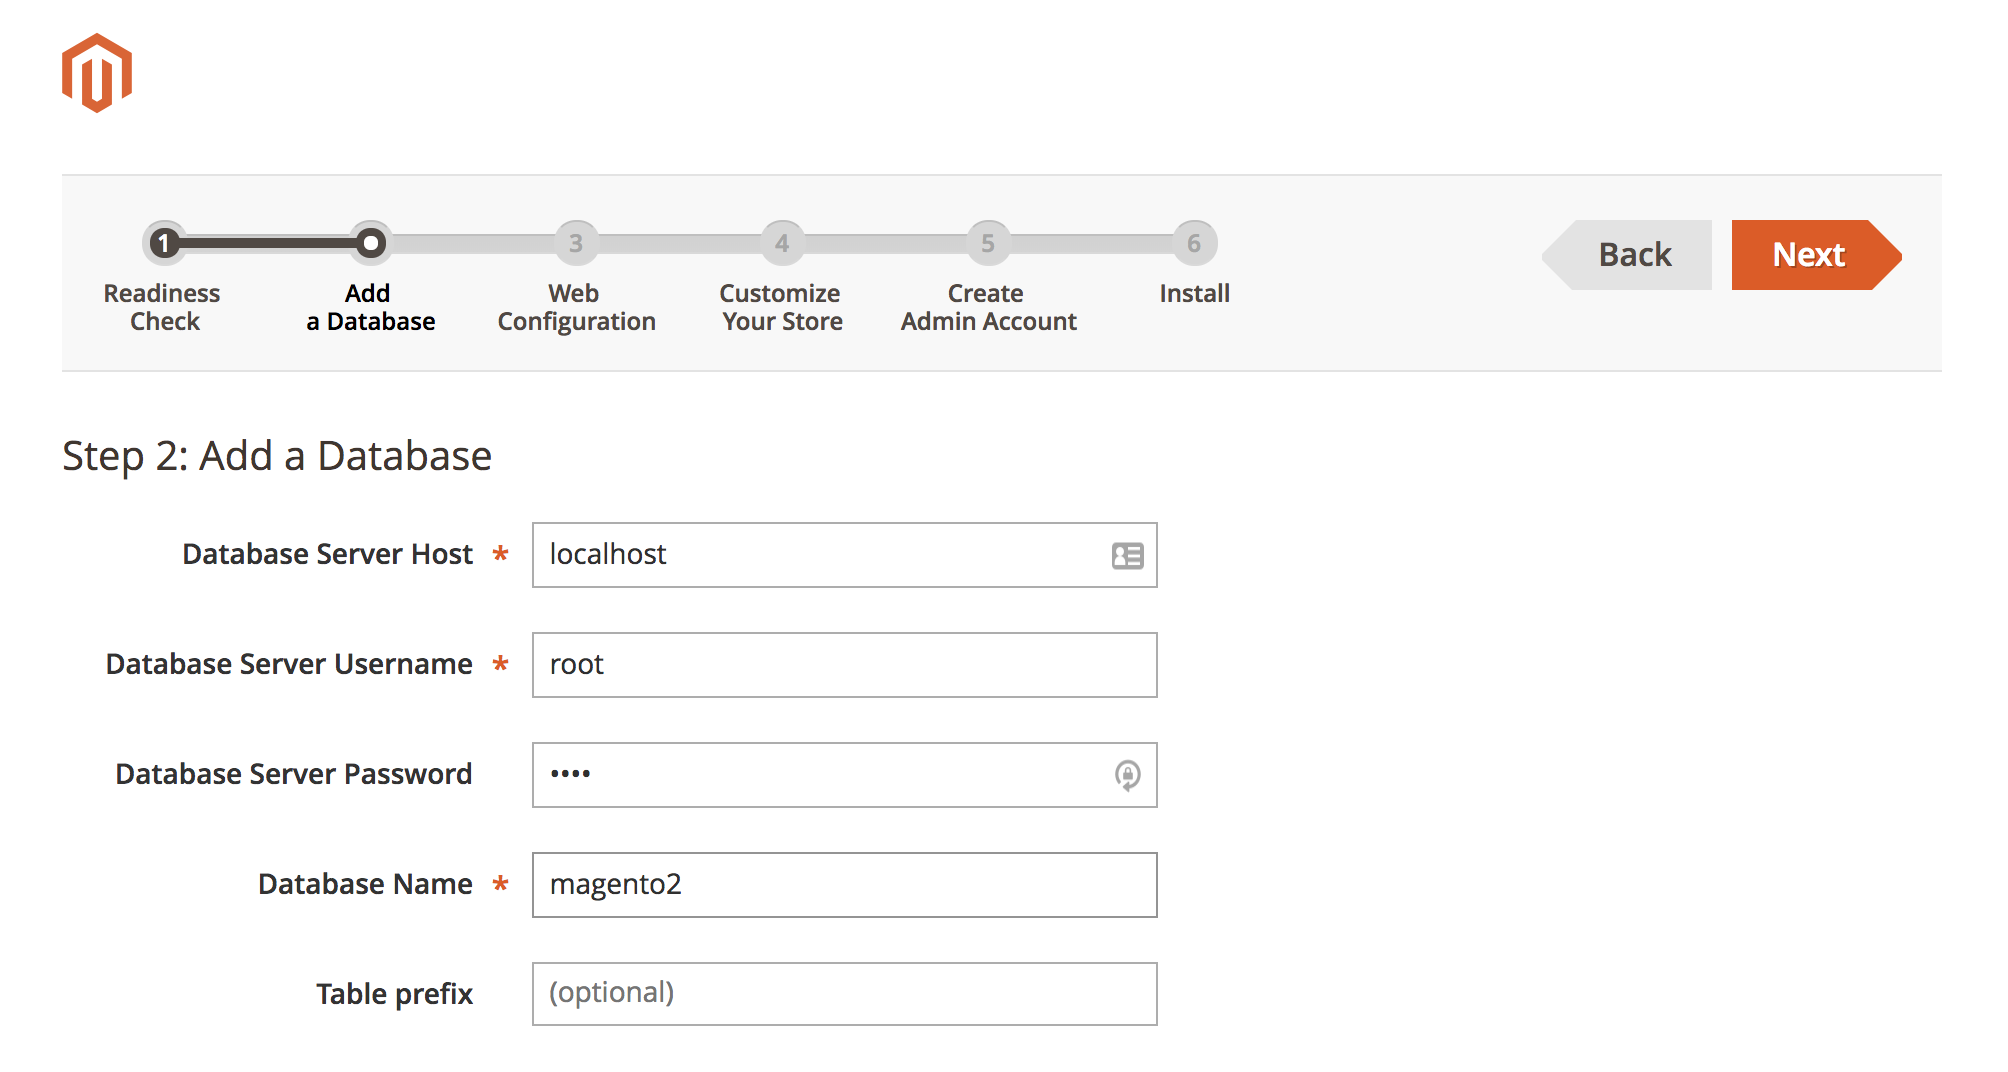
Step 4:Add a database
Database Server Host: Enter “localhost”, if the web server and database are placed on the same hosting account. If the database is located on a different server then we will need to add that hostname or IP address.
Database Server Username: Enter the database privilege users to run the function for instance “root”.
Database Server Password: Enter the user’s password. If a password is not set for that user then this field can be empty
Database Name: Enter the database name for instance magento2
Table prefix: If you want to prefix table names to uniquely identify magento tables then you can enter a maximum of five characters in length. for example mg_1.
Step 5:Configure the web
Your Store Address: Enter the site information, for instance http://testing.com
Magento Admin Address: Enter the admin URL path
Click on the advanced option to enter the relevant information for the web. This is option is optional.
HTTPS Options: Check the checkbox options if your site runs the SSL (Secure Sockets Layer).
Apache Rewrites: Select the use Apaches Web Server Rewrites
Encryption Key: Magento uses encryption key to encrypt the data. You can use the magento generated key or use your own encryption key.
Session Save: You can choose to store the session information on files and databases. By default, the session information is saved on the file. But you can also use the database. If you want to use the database then select the Db

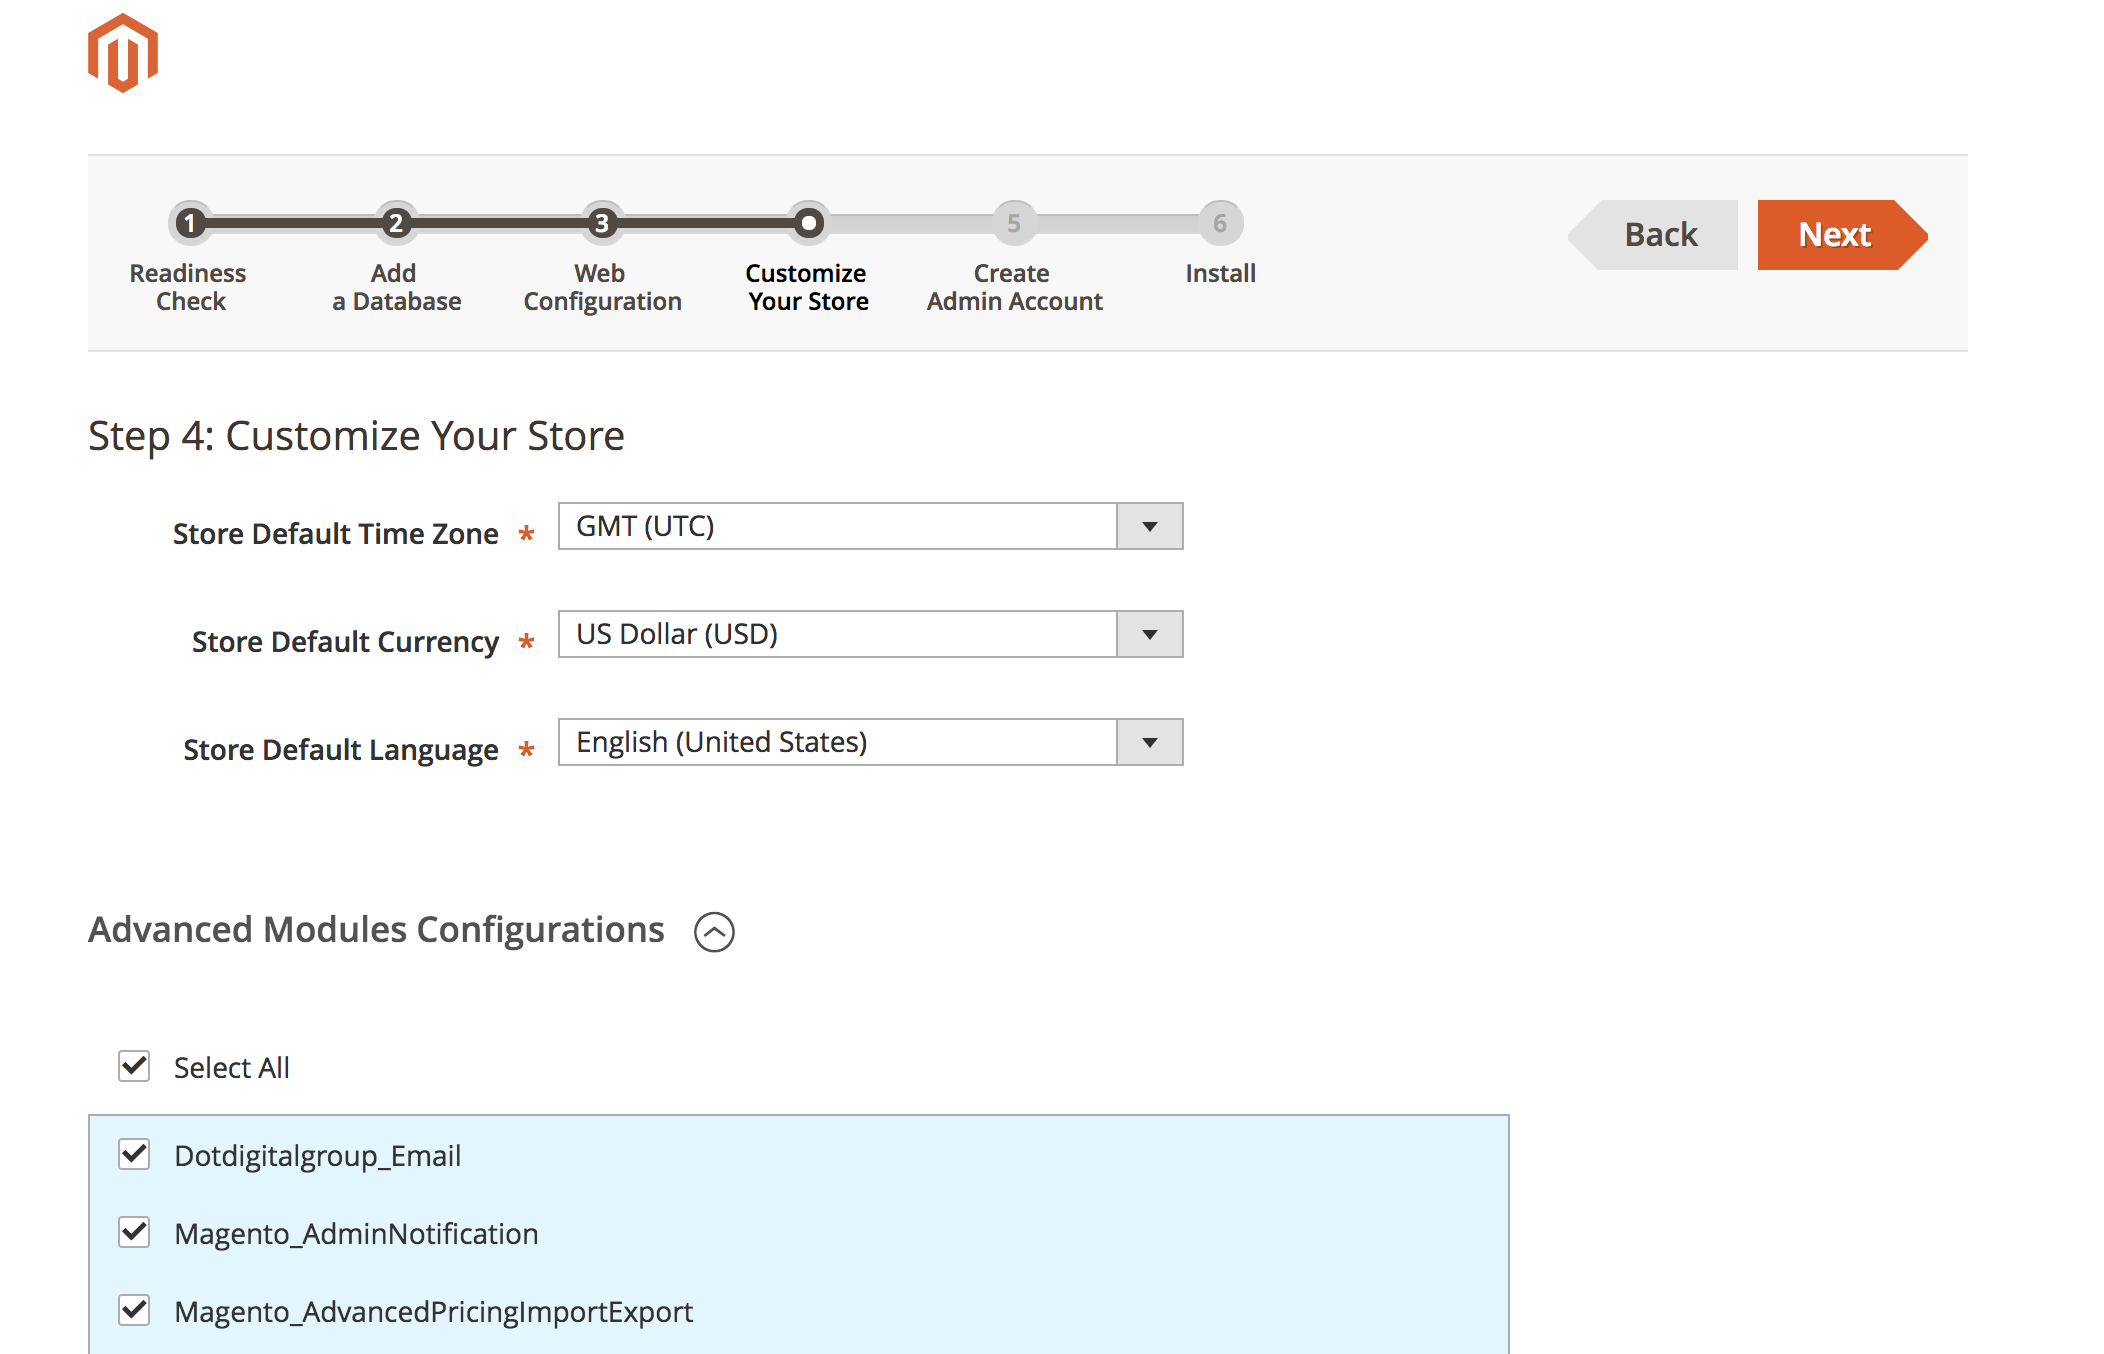
Step 6:Setup store info
In this section, we will set up the store information and enable or disable the magento extension.
Store Default Time Zone: Select the appropriate timezone for your store.
Store Default Currency: Select the currency that will be used in your store.
Store Default Language: Select the language from the list which will be used on your store.
Click on the Advanced Modules Configurations to enable or disable the magento extension. Select the modules which you want to enable or disable
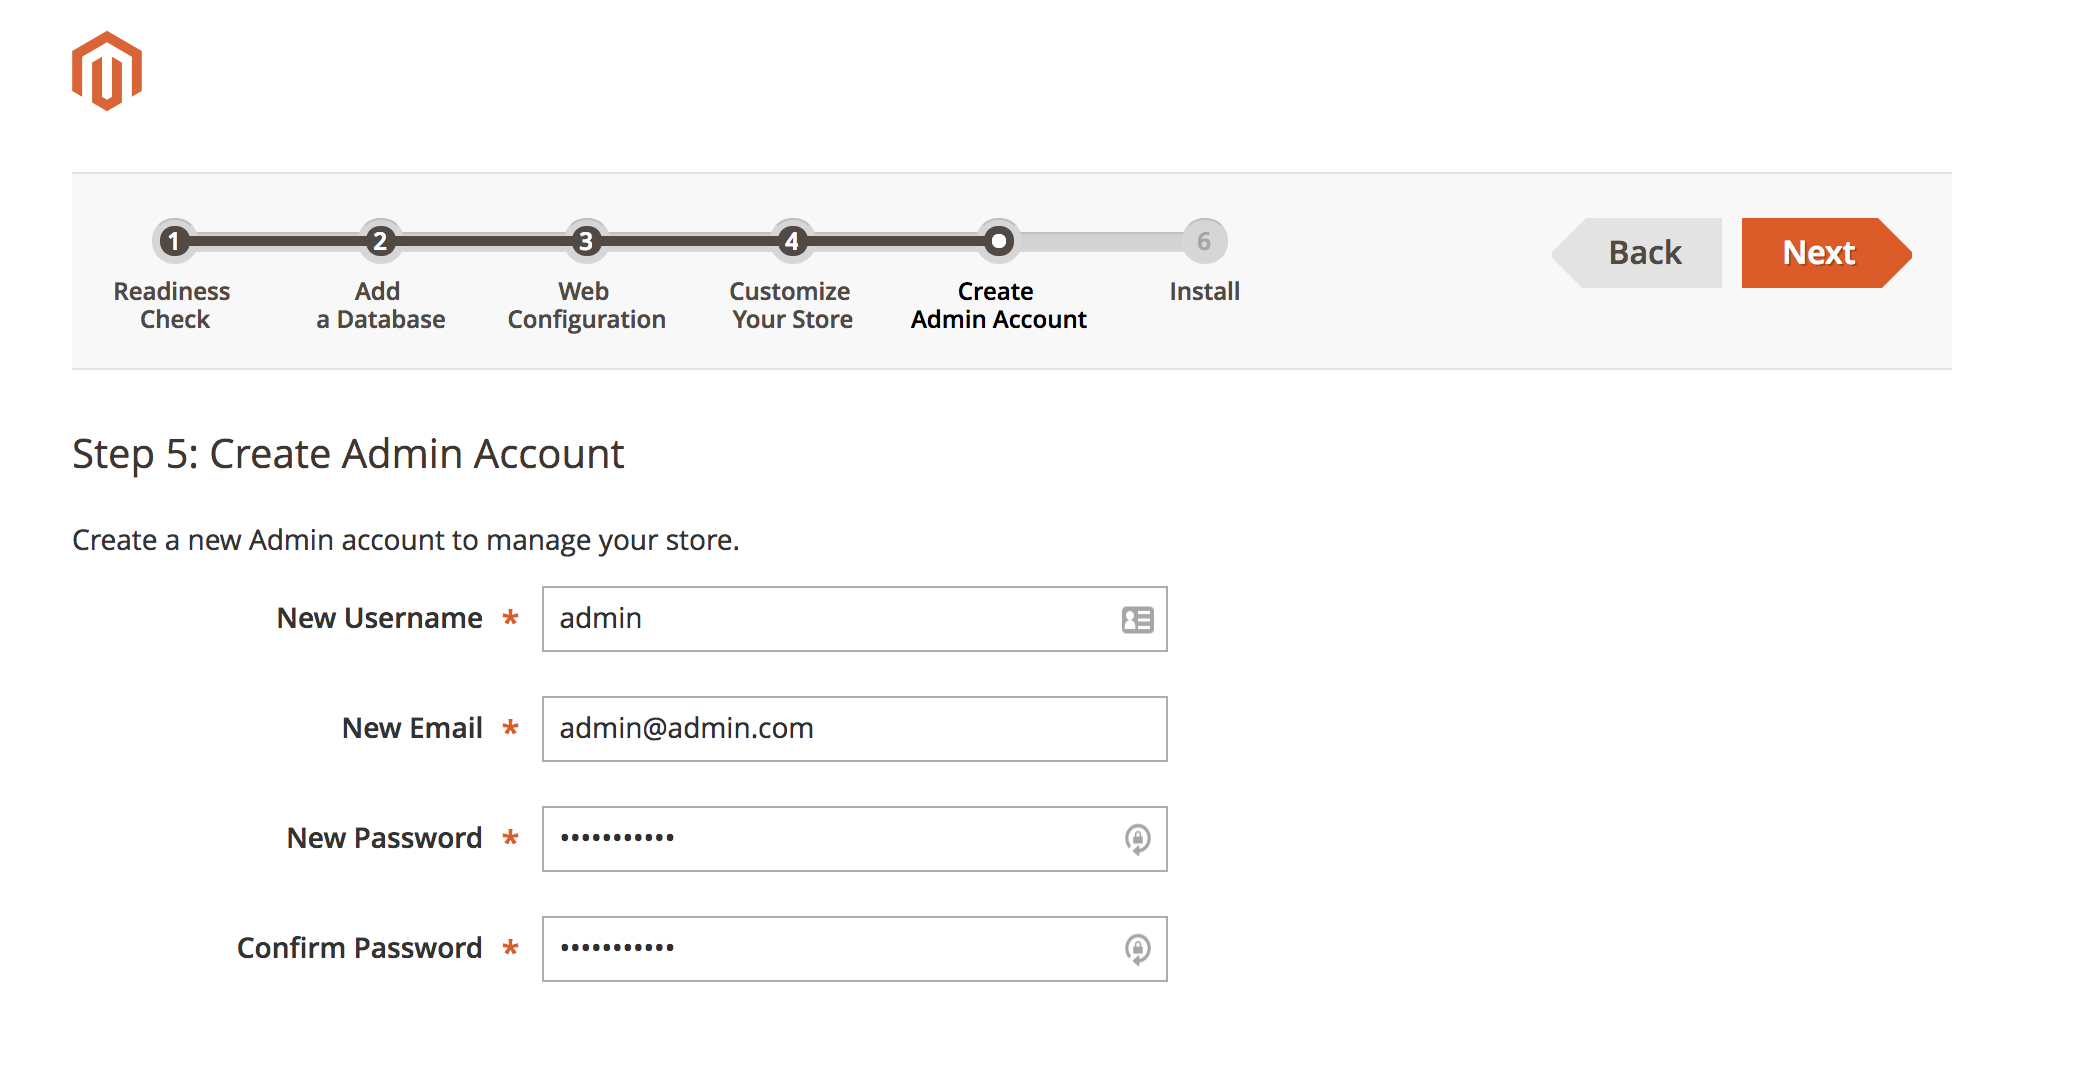
Step 7:Create admin account
In this part, we will create the admin credential. With this information, the admin can log in to the backend.
New Username: Create the admin’s username that will be used on the login admin panel section.
New Email: Enter the admin’s email address
New Password: Enter the admin’s password.
Confirm Password: Enter confirm password and should match with password field
Go to the next step and click on the install now button.