This tutorial will give you the core idea of login systems in procedural PHP. The main concept is to fetch and verify the users’ usernames stored in the database with provided information and create valid users’ information in session as well as redirect them to their respective dashboards.
Table of Content
- Setting up project folder
- Configure Database
- Database Connection
- Login Page
- Styling the login form
- Home Page
- Logout Page
- Source Code
1. Setting up project folder
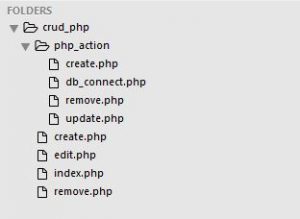
In this section, we’ll be setting up a project folder that contains five files. First of all, create five files and name them db_connect.php, home.php, index.php, logout.php, and style.css. The db_connect.php file contains the database connection, the index.php file contains the login form, the home.php file contains the dashboard, the logout.php file removes the session and redirects to the login page and the style.css file contains the login form design codes. If you have followed the steps correctly then the working folders files structure would look like the below:

2. Configure Database
Database Name: login
Table Name: users
Table Column: id, username, password
Creating the database for this tutorial, you can either download the SQL Command at the end of this tutorial or copy and paste the following code into your MYSQL Database
CREATE DATABASE `login`;

CREATE TABLE `login`.`users` (
  `id` int(11) NOT NULL AUTO_INCREMENT,
  `username` varchar(255) NOT NULL,
  `password` varchar(255) NOT NULL,
  PRIMARY KEY (`id`)
) ENGINE=InnoDB DEFAULT CHARSET=latin1 AUTO_INCREMENT=2 ;
3. Database Connection
Go to db_connect.php i.e. [login/db_connect.php], for managing the database connection. To perform any action related to the database this file is called to execute the query and close the database connection. If you prefer to have a different database name for this tutorial then please change the name of the database in this file which is highlighted below.
<?php

$servername = "127.0.0.1";
$username = "root";
$password = "";
$dbname = "login";

// creating the connection
$connect = new mysqli($servername, $username, $password, $dbname);

// checking the connection
if(!$connect->connect_error) {
	// echo "Successfully connected";
}
else {
	die("Connection Failed : " . $connect->connect_error);
}
4. Login
For now, copy and paste these codes into your index.php file and we’ll go through them afterward.
<?php

// check connection
require_once 'db_connect.php';

session_start();

// check if users already logged in
if(isset($_SESSION['user_id'])) {
	header('location:home.php');
	exit();
}

if( !empty($_POST) ) {
	$errors = array();

	$username = $_POST['username'];
	$password = $_POST['password'];

	if( empty($username) == true OR empty($password) == true ) {
		$errors[] = '* Username/Password field is required';
	}
	else {
		// if username exists
		$sql = "SELECT * FROM users WHERE username = '$username'";
		$query = $connect->query($sql);
		if( $query->num_rows > 0 ) {
			// check username and password
			$password = md5($password);

			$sql = "SELECT * FROM users WHERE username = '$username' AND password = '$password'";
			$query = $connect->query($sql);
			$result = $query->fetch_array();

			$connect->close();

			if($query->num_rows == 1) {
				$_SESSION['logged_in'] = true;
				$_SESSION['user_id'] = $result['id'];

				header('location:home.php');
				exit();
			}
			else {
				$errors[] = ' * Username/Password combination is incorrect';
			}
		}
		else {
			$errors[] = ' * Username doesn\'t exists';
		}
	}

}

?>

<!DOCTYPE html>
<html>
<head>
	<title>Login - Procedural PHP</title>
	<link rel="stylesheet" type="text/css" href="style.css">
</head>
<body>

<fieldset>
	<legend>Login</legend>
	<?php if(!empty($errors)) {?>
		<div class="error">
			<?php foreach ($errors as $key => $value) {
				echo $value;
			} ?>
		</div>
	<?php } ?>


	<form action="<?php echo $_SERVER['PHP_SELF'] ?>" method="POST" >
		<table>
			<tr>
				<th><label for="username">Username</label></th>
				<td>
					<input type="text" name="username" id="username" placeholder="Username" autocomplete="off" />
				</td>
			</tr>
			<tr>
				<th><label for="password">Password</label></th>
				<td>
					<input type="password" name="password" id="password" placeholder="Password" autocomplete="off" />
				</td>
			</tr>
			<tr>
				<th></th>
				<td>
					<button type="submit">Login</button>
				</td>
			</tr>
		</table>
	</form>

</fieldset>

</body>
</html>
Firstly, at the beginning of the code, it calls the database connection file to interact with the database. Secondly, the session is initialized and checks if the user is already logged into the system by redirecting to the home page. Thirdly, the PHP script checks if the form is submitted and validates the login credentials by checking the information with the database. Lastly, the HTML elements include the form elements to enter the login information. Besides that, the external CSS is included in the head section for better UI design.
5. Styling the login form
Go to the style.css file, and copy and paste these codes into your file.
body {
	margin: 0px;
	padding: 0px;
}

fieldset {
	max-width: 400px;
	margin: auto;
	margin-top: 150px;
}

fieldset legend {
	font-size: 20px;
}

fieldset table {
	padding: 20px;
	width: 100%;
}

fieldset table tr td {
	padding: 10px;
}

form {
	width: 100%;
}

input {
	width: 90%;
	padding: 10px;
}

button {
	padding: 10px;
	width: 100%;
}

div.error {
	padding: 10px;
	border-style: solid;
	border-width: 1px;
	border-color: grey;
	border-left-style: solid;
	border-left-width: 4px;
	border-left-color: red;
	background-color: #fff;
}
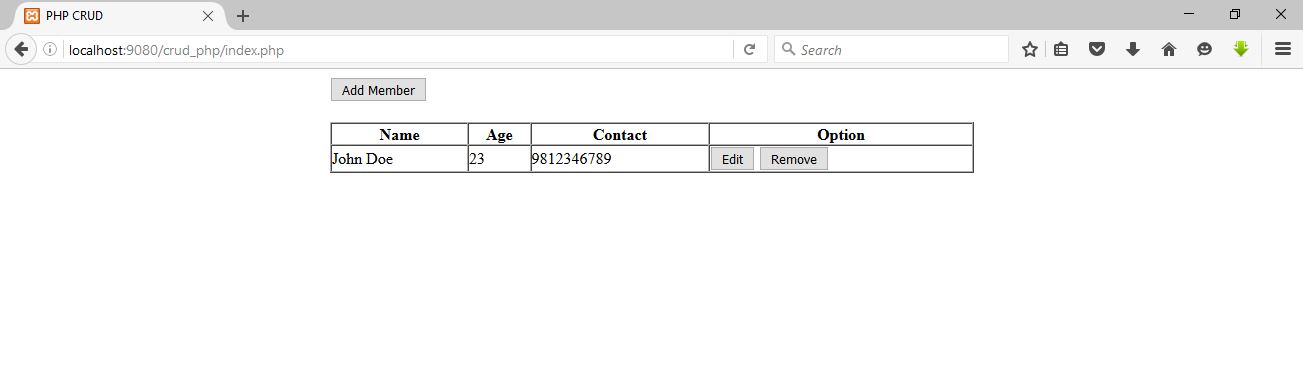
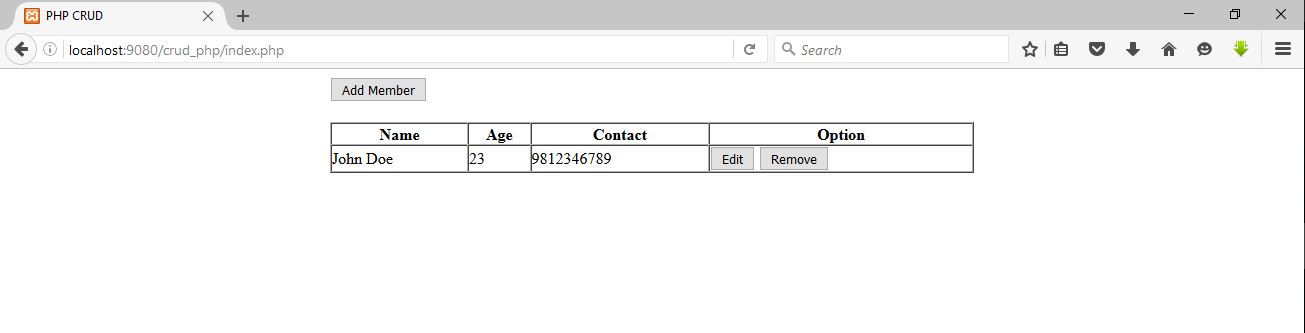
If you have linked this file correctly into your index.php file then the index page would look like the below:

6. Home
In this section, the PHP scripts will redirect valid users to this page. For now, copy and paste these codes into your home.php file and we’ll go through them afterward.
<?php

require_once 'db_connect.php';
session_start();

// check if user is not logged in
if(empty($_SESSION['user_id'])) {
	header('location:index.php');
	exit();
}

if(isset($_SESSION['user_id'])) { ?>


<?php
$user_id = $_SESSION['user_id'];

$sql = "SELECT * FROM users WHERE id = $user_id";
$query = $connect->query($sql);
$result = $query->fetch_array();

// close database connection
$connect->close();

?>

<!DOCTYPE html>
<html>
<head>
	<title>Home</title>
</head>
<body>

<ul>
	<li>Hello, <?php echo $result['username'] ?> </li>
	<li><a href="logout.php">Logout</a></li>
</ul>

</body>
</html>

<?php
}
?>
Firstly, at the beginning of the code calls the database-connected file to retrieve the logged-in user’s information. Secondly, the session is initialized and verifies the user logged state by redirecting them to an index page. Thirdly, the users’ information is retrieved from the database through the $_SESSION[‘user_id’] and displays welcome messages for current logged-in users’ usernames. Lastly, the HTML elements contain the logout link which will be explained in the next part.
7. Logout
In this section, when the users click on the logout link, the first line of the code will start the session. The second code session_unset() will remove all the variables. The third code session_destroy() will destroy the session and the last code will direct to the login page.
<?php

session_start();

session_unset();
session_destroy();

header('location:index.php');
exit();