How to upload image with ajax and php

AJAX (Asynchronous JavaScript and XML) is a popular technique to update part of a web page without reloading the whole page. The Ajax method will enhance the web application better, faster, and more interactive.

To upload the image into the database, we will be working with procedural PHP, and using the Ajax functionality to send the request to the server.

At the end of this tutorial, we have provided a source code and database link below section.

Table of Content

  1. Setting up assets file and project folder
  2. Configure the Database
  3. Creating a form
  4. Creating the PHP file to process
  5. Submitting the form using Ajax
  6. Display all uploaded data

1. Setting up assets file and project folder

The asset file that we will be working with in this tutorial is jquery, bootstrap, and fileinput. To download these files click on the asset name which will redirect to their official website.

Firstly, create the project folder named as upload_image or something else you desire. Secondly, after creating the project folder, go inside that project folder and create three folders (assets, php_action, uploads) i.e. [upload_image/assets], [upload_image/php_action] and [upload_image/uploads], and two php files namely i.e. [upload_image/index.php] and [upload_image/view.php].

In the assets folder, create the three folders namely bootstrap, jquery, and file input, and paste those downloaded plugins respectively. In the php_action folder create a php file and name the file an uploadImage.php which will be processing the image information into the database. The uploads folder contains the uploaded images.

If you have followed the instruction correctly then the project folder and file structure could look like the below:

Upload Image Folder and file structure

2. Configure the Database

Database Name: upload_image
Table Name: users
Table Column: id, name, image

Copy and paste the following SQL command into your MySQL database to create a database and table.


CREATE DATABASE `upload_image`;

CREATE TABLE `upload_image`.`users` (
  `id` int(11) NOT NULL AUTO_INCREMENT,
  `name` varchar(255) NOT NULL,
  `image` text NOT NULL,
  PRIMARY KEY (`id`)
) ENGINE=InnoDB DEFAULT CHARSET=latin1 AUTO_INCREMENT=1 ;


3. Creating a form

We will be using the Bootstrap framework to create a simple form for better UI. For now, go to the index.php file and paste these codes and we will go through them afterward.


<!DOCTYPE html>
<html>
<head>
	<title></title>
	<!-- boostrap css-->
	<link rel="stylesheet" type="text/css" href="assets/bootstrap/css/bootstrap.min.css">

	<!-- file input css -->
	<link rel="stylesheet" type="text/css" href="assets/fileinput/css/fileinput.min.css">
</head>
<body>

	<div class="col-md-5 col-sm-5 col-md-offset-4 col-sm-offset-4">
		<div class="page-header">
			<h3>Upload Image with Ajax</h3>

			<a href="view.php" class="btn btn-default">View User</a>
		</div>

		<div id="messages"></div>

		<form action="php_action/uploadImage.php" method="post" enctype="multipart/form-data" id="uploadImageForm">
		  <div class="form-group">
		    <label for="fullName">Name</label>
		    <input type="text" class="form-control" id="fullName" name="fullName" placeholder="Name">
		  </div>
		  <div class="form-group">
		    <label for="exampleInputPassword1">Photo</label>		    
		    <div id="kv-avatar-errors-2" class="center-block" style="width:800px;display:none"></div>

            <div class="kv-avatar center-block" style="width:200px">
		        <input id="avatar-2" name="userImage" type="file" class="file-loading">
		    </div>
		  </div>
		  <button type="submit" class="btn btn-default">Submit</button>
		</form>

	</div>
	
	<!-- jquery -->
	<script type="text/javascript" src="assets/jquery/jquery.min.js"></script>
	<!-- bootsrap js -->
	<script type="text/javascript" src="assets/bootstrap/js/bootstrap.min.js"></script>
	<!-- file input -->
	<script src="assets/fileinput/js/plugins/canvas-to-blob.min.js" type="text/javascript"></script>	
	<script src="assets/fileinput/js/plugins/sortable.min.js" type="text/javascript"></script>	
	<script src="assets/fileinput/js/plugins/purify.min.js" type="text/javascript"></script>
	<script src="assets/fileinput/js/fileinput.min.js"></script>

	<script type="text/javascript">
		var btnCust = '<button type="button" class="btn btn-default" title="Add picture tags" ' + 
		    'onclick="alert(\'Call your custom code here.\')">' +
	    	'<i class="glyphicon glyphicon-tag"></i>' +
		    '</button>'; 
		    
		$("#avatar-2").fileinput({
	    overwriteInitial: true,
	    maxFileSize: 1500,
	    showClose: false,
	    showCaption: false,
	    showBrowse: false,
	    browseOnZoneClick: true,
	    removeLabel: '',
	    removeIcon: '<i class="glyphicon glyphicon-remove"></i>',
	    removeTitle: 'Cancel or reset changes',
	    elErrorContainer: '#kv-avatar-errors-2',
	    msgErrorClass: 'alert alert-block alert-danger',
	    defaultPreviewContent: '<img src="uploads/default-avatar.jpg" alt="Your Avatar" style="width:160px"><h6 class="text-muted">Click to select</h6>',
	    layoutTemplates: {main2: '{preview} ' +  btnCust + ' {remove} {browse}'},
	    allowedFileExtensions: ["jpg", "png", "gif"]
		});
	</script>
</body>
</html>

In this file, we will be including the downloaded plugins and create the form to upload the images. In the above code at the head section, we will be including the bootstrap and fileinput css file. At the bottom of the body section, we will be including the jquery, bootstrap, and fileinput js files.

4. Creating the PHP file to Process

In this section, we will be creating a simple PHP script to store the uploaded image file in the server directory by giving a unique name and storing that name in the database. For now, copy and paste these codes into the uploadImage.php file which is located in the php_action folder i.e. [upload_image/php_ation/uploadImage.php].


<?php 

if($_POST) {
	// database connection
	$server = '127.0.0.1';
	$username = 'root';
	$password = '';
	$dbname = 'upload_image';

	$conn = new mysqli($server, $username, $password, $dbname);

	// check db connection
	if($conn->connect_error) {
		die("Connection Failed : " . $conn->connect_error);
	} 
	else {
		// echo "Successfully Connected";
	}

	$valid = array('success' => false, 'messages' => array());

	$name = $_POST['fullName'];

	$type = explode('.', $_FILES['userImage']['name']);
	$type = $type[count($type) - 1];
	$url = '../uploads/' . uniqid(rand()) . '.' . $type;

	if(in_array($type, array('gif', 'jpg', 'jpeg', 'png'))) {
		if(is_uploaded_file($_FILES['userImage']['tmp_name'])) {
			if(move_uploaded_file($_FILES['userImage']['tmp_name'], $url)) {

				// insert into database
				$sql = "INSERT INTO users (name, image) VALUES ('$name', '$url')";

				if($conn->query($sql) === TRUE) {
					$valid['success'] = true;
					$valid['messages'] = "Successfully Uploaded";
				} 
				else {
					$valid['success'] = false;
					$valid['messages'] = "Error while uploading";
				}

				$conn->close();

			}
			else {
				$valid['success'] = false;
				$valid['messages'] = "Error while uploading";
			}
		}
	}

	echo json_encode($valid);

	// upload the file 
}

In the above codes, the first script checks if the form is submitted.  After that, the database connection is created and stored in the conn variable for further processing. Secondly, the uploaded image type is checked and creates a unique id for the image name and moves to the uploads folder, and stores the information in the database.

5. Submitting the form using Ajax

To upload the form using Ajax, we will need to do several things in the index.php file. Copy and paste these codes into the index.php file at the end of the script where avatar-2 is initiated.


<script>
   $(document).ready(function() {
      $("#uploadImageForm").unbind('submit').bind('submit', function() {

         var form = $(this);
         var formData = new FormData($(this)[0]);

         $.ajax({
            url: form.attr('action'),
            type: form.attr('method'),
            data: formData,
            dataType: 'json',
            cache: false,
            contentType: false,
            processData: false,
            async: false,
            success:function(response) {
               if(response.success == true) {
                  $("#messages").html('<div class="alert alert-success alert-dismissible" role="alert">'+
                  '<button type="button" class="close" data-dismiss="alert" aria-label="Close"><span aria-hidden="true">&times;</span></button>'+
                  response.messages + 
               '</div>');

                  $('input[type="text"]').val('');
                  $(".fileinput-remove-button").click();
               }
               else {
                  $("#messages").html('<div class="alert alert-warning alert-dismissible" role="alert">'+
                  '<button type="button" class="close" data-dismiss="alert" aria-label="Close"><span aria-hidden="true">&times;</span></button>'+
                  response.messages + 
               '</div>');
               }
            }
         });

         return false;
      });
   });
</script>

In the above codes, the form on submit event is caught by #uploadImageForm id which was created in Chapter 3. The form variable holds the action, and method values of the form element, whereas the formData variable holds the data of the form. After that, the jquery built-in Ajax function will be used to process the data to the server and respond with the message state.

6. Display all uploaded data

In this section, we will be displaying the users’ information that is stored in the database. Copy and paste these codes into the view.php file which is located at [upload_image/view.php].


<!DOCTYPE html>
<html>
<head>
	<title></title>

	<!-- boostrap css-->
	<link rel="stylesheet" type="text/css" href="assets/bootstrap/css/bootstrap.min.css">
</head>
<body>

<br /> <br /> <br />
<div class="col-md-5 col-sm-5 col-md-offset-4 col-sm-offset-4">
	<a href="index.php" class="btn btn-default">Back</a>
	<table class="table table-bordered">
		<tr>
			<th>S.no</th>
			<th>Name</th>
			<th>Photo</th>
		</tr>

		<?php 
		// database connection
		$server = '127.0.0.1';
		$username = 'root';
		$password = '';
		$dbname = 'upload_image';

		$conn = new mysqli($server, $username, $password, $dbname);

		// check db connection
		if($conn->connect_error) {
			die("Connection Failed : " . $conn->connect_error);
		} 
		else {
			// echo "Successfully Connected";
		}

		$sql = "SELECT * FROM users";
		$query = $conn->query($sql);

		$x = 1;
		while ($result = $query->fetch_assoc()) {
			$image = substr($result['image'], 3);

			echo "<tr>
				<td>".$x."</td>
				<td>".$result['name']."</td>
				<td> <img src='".$image."' style='height:100px; width:100px;' /> </td>
			</tr>";
			$x++;
		}

		?>
	</table>
</div>

</body>
</html>

Download Source Code

Download

CodeIgniter Tutorial – Register and Login with Ajax

Codeigniter is a PHP framework that contains libraries, helpers, plugin-in, and other resources. It will make the PHP codes simple, quick, and user-friendly. It is a lightweight MVC programming technique to keep the business logic separate from the layout of the application. MVC stands for Model View Controller which is a software development method splitting the data layer (Model), the business logic (Controller), and the layout of the application (View). With the help of this framework, we will be building the simple Register and Login application with Ajax.

Table of Content

  1. Introduction
  2. Configure Config File
  3. Configure Database
  4. Database Connection
  5. Register and Login Demonstration
  6. Source Code

Introduction

This tutorial will teach you to create a register and login system with Ajax. The registration and login system is the most important role in the web application. The user’s login status will be checked by the session.

The source code of this application is provided at the end of this tutorial, you can easily download them by clicking on the download button. As well as the database is also required to run the application correctly. So please do not forget to download the database and run them into the phpMyAdmin.

Configure Config File

In this part, Go to the config.php file i.e. application/config/config.php and you must change the base URL root to work the code properly without any errors. You will have to modify the base URL value in the config file to help the CodeIgniter to guess the protocol and path of your installation.


<?php
/*
|--------------------------------------------------------------------------
| Base Site URL
|--------------------------------------------------------------------------
| URL to your CodeIgniter root. Typically this will be your base URL,
| WITH a trailing slash:
| http://localhost/codeigniter_register_login/
*/
$config['base_url'] = 'http://localhost:9080/codeigniter_register_login/';

?>

Configure Database

Database Name: codeigniter_register_login
Table Name: users
Table Column: id, username, password, salt, name, contact

To create the database for this tutorial, either you can download the SQL file which is provided at the end of this tutorial or copy and paste the following SQL command into your MYSQL Database.


CREATE DATABASE `crud_datatables_codeigniter`;

CREATE TABLE `codeigniter_register_login`.`users` (
  `id` int(11) NOT NULL AUTO_INCREMENT,
  `username` varchar(255) NOT NULL,
  `password` varchar(255) NOT NULL,
  `salt` text NOT NULL,
  `name` varchar(255) NOT NULL,
  `contact` varchar(255) NOT NULL,
  PRIMARY KEY (`id`)
) ENGINE=InnoDB DEFAULT CHARSET=latin1 AUTO_INCREMENT=1 ;

Database Connection

In database.php file i.e. [application/config/database.php], contains a database connection. If you have a different database name then change the database name in the database.php file highlighted below.


$db['default'] = array(
	'dsn'	=> '',
	'hostname' => 'localhost',
	'username' => 'root',
	'password' => '',
	'database' => 'codeigniter_register_login',
	'dbdriver' => 'mysqli',
	'dbprefix' => '',
	'pconnect' => FALSE,
	'db_debug' => (ENVIRONMENT !== 'production'),
	'cache_on' => FALSE,
	'cachedir' => '',
	'char_set' => 'utf8',
	'dbcollat' => 'utf8_general_ci',
	'swap_pre' => '',
	'encrypt' => FALSE,
	'compress' => FALSE,
	'stricton' => FALSE,
	'failover' => array(),
	'save_queries' => TRUE
);

Source Code !!

Download

CRUD – Codeigniter, Datatables, Ajax

Codeigniter is a PHP framework containing libraries, helpers, plugin-in, and other resources. It will make the codes in PHP simple, quick, and user-friendly.  It is a lightweight MVC programming technique to keep the business logic separate from the display logic. MVC stands for Model View Controller which is a software development method splitting the data layer (Model), the business logic (Controller), and the layout of the application (View). With the help of this framework, we’ll be building a simple CRUD with DataTables and Ajax.

Table of Content

  1. Introduction
  2. Configure Config File
  3. Configure Database
  4. Database Connection
  5. CRUD Demonstration
  6. Source Code

1. Introduction

CRUD stands for Create, Retrieve, Update, Delete to interact with the database table’s data.  As a web developer, CRUD is a usual work in your career, and with the integration of the datatables plugin, it will make the table more interactive, feasible, and Better UI. You can download the source code and database SQL query at the end of this tutorial. You will have to make some changes in the source code to run the program

2. Configure Config file

In this part, Go to the config.php file i.e. application/config/config.php and you must change the base URL root to work the code properly without any errors. You will have to modify the base URL value in the config file to help the CodeIgniter to guess the protocol and path of your installation.


<?php
/*
|--------------------------------------------------------------------------
| Base Site URL
|--------------------------------------------------------------------------
| URL to your CodeIgniter root. Typically this will be your base URL,
| WITH a trailing slash:
| http://localhost/crud_datatables_codeigniter
*/
$config['base_url'] = 'http://localhost:9080/crud_datatables_codeigniter';

?>

3. Configure the Database

Database Name: crud_datatables_codeigniter
Table Name: members
Table Column: id, fname, lname, age, contact, address

To create the database for this tutorial, either you can download the SQL file which is provided at the end of this tutorial or copy and paste the following SQL command into your MYSQL Database.


CREATE DATABASE `crud_datatables_codeigniter`;

CREATE TABLE `crud_datatables_codeigniter`.`members` (
  `id` int(11) NOT NULL AUTO_INCREMENT,
  `fname` varchar(255) NOT NULL,
  `lname` varchar(255) NOT NULL,
  `age` varchar(255) NOT NULL,
  `contact` varchar(255) NOT NULL,
  `address` varchar(255) NOT NULL,
  PRIMARY KEY (`id`)
) ENGINE=InnoDB DEFAULT CHARSET=latin1 AUTO_INCREMENT=1 ;

4. Database Connection

In database.php file i.e. [application/config/database.php], contains a database connection. If you have a different database name then change the database name in the database.php file highlighted below.


$db['default'] = array(
	'dsn'	=> '',
	'hostname' => 'localhost',
	'username' => 'root',
	'password' => '',
	'database' => 'crud_datatables_codeigniter',
	'dbdriver' => 'mysqli',
	'dbprefix' => '',
	'pconnect' => FALSE,
	'db_debug' => (ENVIRONMENT !== 'production'),
	'cache_on' => FALSE,
	'cachedir' => '',
	'char_set' => 'utf8',
	'dbcollat' => 'utf8_general_ci',
	'swap_pre' => '',
	'encrypt' => FALSE,
	'compress' => FALSE,
	'stricton' => FALSE,
	'failover' => array(),
	'save_queries' => TRUE
);

6. Source Code

Download

Submitting the form with Ajax

AJAX (Asynchronous JavaScript and XML) is a great technique usually used for updating the portion of a web page without refreshing the whole page. The help of the Ajax technique it will make the web application much better, faster, and more interactive. To submit the form with Ajax we will be working with procedural PHP, HTML, and Ajax.

At the end of this tutorial, we’ll provide you with a source code and database link.

Table of Content

  1. Setting up assets file and project folder
  2. Configure Database
  3. Creating the HTML form page to display
  4. Creating the PHP file to process
  5. Submitting the form using Ajax

1. Setting up assets file and Project folder

In this part, we assume that you have downloaded the jQuery file from a jQuery official website. If you haven’t downloaded it yet, then click here to download.

First of all, create the project folder named “submit_from_using_ajax” or something else you wanted and inside that project, folder create another folder named “jquery” i.e. [submit_form_using_ajax/jquery] which contains the downloaded jquery plugin. Now move or come back to the project folder directory and create three files namely index.php, add.php, and add.js e.g. [submit_form_using_ajax/index.php], [submit_form_using_ajax/add.php], and [submit_form_using_ajax/add.js]. If you have followed the instruction correctly then the folder and file structure should look like the below:

submit_form_using_ajax_file_structure

2. Configure Database

Database Name: members
Table Name: members
Table Column: id, fname, lname, contact, active

Copy and paste the following SQL command into your MySQL database to create a database and table.


CREATE DATABASE `members`;

CREATE TABLE `members`.`members` (
  `id` int(11) NOT NULL AUTO_INCREMENT,
  `fname` varchar(255) NOT NULL,
  `lname` varchar(255) NOT NULL,
  `contact` varchar(20) NOT NULL,
  `active` int(11) NOT NULL DEFAULT '1',
  PRIMARY KEY (`id`)
) ENGINE=InnoDB DEFAULT CHARSET=latin1 AUTO_INCREMENT=3;

3. Creating the HTML form

We’ll be using HTML form elements to create a simple form since designing is not our main concern. Firstly, go to the index.php file which was created at chapter 1. Copy and paste these codes into the index.php file and we will go through them afterward:


<!DOCTYPE html>
<html>
<head>
	<title></title>
</head>
<body>


<form action="add.php" method="post" id="submitForm">
	<label>First Name</label>
	<input type="text" name="fname" id="fname" />
	

	<label>Last Name</label>
	<input type="text" name="lname" id="lname" />


	<label>Contact</label>
	<input type="text" name="contact" id="contact" />	


	<button type="submit">Submit</button>

</form>


<script type="text/javascript" src="jquery/jquery.min.js"></script>
<script type="text/javascript" src="add.js"></script>
</body>
</html>

In the above codes, the input field and button are kept inside the form element. After that, the action of the form is defined as add.php and the method is defined as “POST” so when submitting the form, the input value will not be visible to the users. Lastly, the form id is defined as submitForm, which will be using in Ajax’s part in Chapter 5. The highlighted codes are crucial to run the Ajax function. The first script links to the jQuery plugin and the second script links to add.js.

Whenever you submit the form, the page will redirect to a blank page. That part will be done in the next chapter.

4. Creating the PHP file to process

This part is straightforward. To process the form, we will be creating an uncomplicated PHP script to process the form. Copy and paste these codes into add.php file and we will go through them afterward:


<?php 
   if($_POST) { $localhost = "127.0.0.1"; $username = "root"; $password = ""; $dbname = "members"; // connect $connect = new mysqli($localhost, $username, $password, $dbname); // checking the connection if($connect->connect_error) {
		die("connection failed : " . $connect->connect_error);
	} else {
		// echo "Connected Successfully";
	}

	$fname = $_POST['fname'];
	$lname = $_POST['lname'];
	$contact = $_POST['contact'];

	$sql = "INSERT INTO members (fname, lname, contact) VALUES ('$fname', '$lname', '$contact')";
	if($connect->query($sql) == TRUE) {
		echo "Successfully added";
	} else {
		echo "Error while added the information";
	}

	$connect->close();
	// closing the database connection

}

?>

This tutorial guides you to simply submit the Ajax form. Hence, the form validation is not implemented in this script. The first line of the script checks a form submitted using a $_POST variable furthermore, creates a database connection and executes the query. After that, it checks query is executed successfully and returns proper messages. At the end of the script, the opened database connection is closed to prevent an open database connection.

If you try to submit the form then the script will return proper messages.

5. Submitting the form using Ajax

Finally, we reached the main part of this tutorial. To submit the form with Ajax, we’ll need to do several things in our JavaScript file. Firstly, we need to capture the forms’ submit button so that the default action does not occur. Secondly, we need to pass the form data to the server by using Ajax and display an appropriate message. For now, copy and paste these codes into the add.js file and we will go through them afterward:


$(document).ready(function() {
	$("#submitForm").unbind('submit').bind('submit', function() {
		var form = $(this);

		var url = form.attr('action');
		var type = form.attr('method');

		// sending the request to server
		$.ajax({
			url: url,
			type: type,
			data: form.serialize(),
			dataType: 'text',
			success:function(response) {
				$("#submitForm")[0].reset();
				alert(response);
			}
		});

		return false;
	});
});

Now when you submit the form, the JavaScript code catches that event by #submitForm id which was created in Chapter 3. The variable form holds the input values, and the URL and type variable gets the form action and method values respectively. After that, the jquery built-in Ajax function will be used to send the data to a server which was defined in a form element. The serialize function is used to convert the values into an array instead of pulling the form data individually.

The below video displays a detailed tutorial for submitting the form using Ajax. We recommend you go through the above chapters and then watch this video to fully understand how the Ajax form works.

Download Source Code!!!

Download

Datatables CRUD with PHP, MYSQLI, BOOTSTRAP

Datatables is a plug-in to enhance the HTML table interaction and provide adaptable tools. Datatables CRUD (Create, Retrieve Update Delete) will improve your application in terms of readability, Better UI, and other advantages. There are many benefits of using this plug-in, but for this tutorial, we will be discussing a simple Create, Retrieve, Update, and Delete (CRUD).

Table of Content

  1. Introduction
  2. Configure Database
  3. Setting assets file and project folder
  4. Database Connection
  5. Create Member
  6. Retrieve Data
  7. Remove Member
  8. Update Member

1. Introduction

In this section, we are going to develop a CRUD (Create, Retrieve, Update, Delete) PHP operation with the Datatable jquery plugin which will improve the table flexibility. In the future as a web developer, you will be working with these basic functionalities namely create, retrieve, update, and delete. The CRUD logic is relevant to CRUD with PHP MYSQLI Tutorial. The Ajax and Datatables are only used to raise the performance of CRUD operations. To understand how CRUD operation works in the Datatable jquery plugin, We recommend you go through each part of this tutorial.

The below video illustrates the final system of this tutorial. The source code of this application will be provided at the end of this tutorial.

2. Configure Database

Database Name: datatables_crud
Table Name: members
Table Column: id, name, contact, address, active

To create the database for this tutorial, you can either download the SQL command by clicking the button which is provided at the end of this tutorial or manually copy and paste the following SQL command into your MYSQL database.


CREATE DATABASE `datatables_crud`;

CREATE TABLE `datatables_crud`.`members` (
`id` int(11) NOT NULL AUTO_INCREMENT,
`fname` varchar(255) NOT NULL,
`lname` varchar(255) NOT NULL,
`contact` varchar(20) NOT NULL,
`active` int(11) NOT NULL DEFAULT '1',
PRIMARY KEY (`id`)
) ENGINE=InnoDB DEFAULT CHARSET=latin1 AUTO_INCREMENT=3 ;

3. Setting assets file and project folder

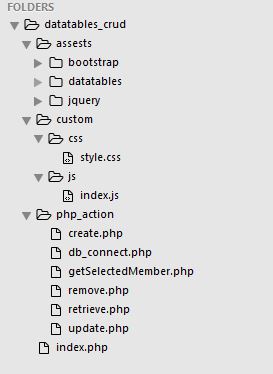
In this part, we will be creating a folder and file within this project folder. In this project, there will be three folders and one file. First of all, create three folders and a file namely assets, custom, and php_action and index.php as a file i.e. : [datatables_crud/assests], [datatables_crud/custom], [datatables_crud/php_action], and [datatables_crud/index.php].

Firstly, In an assets folder, bootstrap, datatables, and jquery files are included. Please download the files and keep them in this folder. Secondly, In a custom folder, CSS and js folder are required and within that folder, each folder contains one file i.e. [datatables_crud/custom/css/style.css] and [datatables_crud/custom/js/index.js] respectively. Finally, The php_action folder which includes six files and they are create.php, db_connect.php, getSelectedMember.php, remove.php, retrieve.php, and update.php.

If you have followed the steps correctly then the working folders and files structure would look like the below:

datatables_crud_folder_structure

4. Database Connection

In db_connect.php file i.e. [php_action/db_connect.php], contains a database connection. In this application, the db_connect.php file will be used to perform any action for CRUD. Such as connecting to the database, executing the query, and closing the connection. If you have a different database name for this tutorial, please change the name of the database in the db_connect.php file which is highlighted below.


<?php 

$servername = "127.0.0.1"; 
$username = "root"; 
$password = ""; 
$dbname = "datatables_crud"; 

// create connection 
$connect = new mysqli($servername, $username, $password, $dbname); 

// check connection 
if($connect->connect_error) {
die("Connection Failed : " . $connect->connect_error);
} else {
// echo "Successfully Connected";
}

?>

5. Create Member

5.1 Add Member Button and Linking to Assets file

To start with inserting the member’s information into the system, First of all, we’ll create a bootstrap pop-up modal containing the input fields within a form and go to index.php file i.e. [datatables_crud/index.php], and add an “Add Member” button at the top of the table. Please check your index.php file plugin’s link which is necessary to run the various plugin for this tutorial.


<!DOCTYPE html>
<html>
<head>
<title>CRUD SYSTEM</title>

<!-- bootstrap css -->
<link rel="stylesheet" type="text/css" href="assests/bootstrap/css/bootstrap.min.css">
<!-- datatables css -->
<link rel="stylesheet" type="text/css" href="assests/datatables/datatables.min.css">

</head>
<body>

<div class="container">
   <div class="row">
      <div class="col-md-12">

         <center><h1 class="page-header">CRUD System <small>DataTables</small> </h1> </center>

         <div class="removeMessages"></div>

         <button class="btn btn-default pull pull-right" data-toggle="modal" data-target="#addMember" id="addMemberModalBtn">
            <span class="glyphicon glyphicon-plus-sign"></span>	Add Member
         </button>

         <br /> <br /> <br />

         <table class="table" id="manageMemberTable">					
            <thead>
               <tr>
                  <th>S.no</th>
                  <th>Name</th>													
                  <th>Address</th>
                  <th>Contact</th>								
                  <th>Active</th>
                  <th>Option</th>
               </tr>
            </thead>
         </table>
      </div>
   </div>
</div>

<!-- add modal -->
<div class="modal fade" tabindex="-1" role="dialog" id="addMember">
   <div class="modal-dialog" role="document">
   <div class="modal-content">
   <div class="modal-header">
   <button type="button" class="close" data-dismiss="modal" aria-label="Close"><span aria-hidden="true">&times;</span></button>
   <h4 class="modal-title"><span class="glyphicon glyphicon-plus-sign"></span>	Add Member</h4>
   </div>
   
   <form class="form-horizontal" action="php_action/create.php" method="POST" id="createMemberForm">

   <div class="modal-body">
      <div class="messages"></div>

         <div class="form-group"> <!--/here teh addclass has-error will appear -->
         <label for="name" class="col-sm-2 control-label">Name</label>
         <div class="col-sm-10"> 
         <input type="text" class="form-control" id="name" name="name" placeholder="Name">
         <!-- here the text will apper -->
         </div>
         </div>
         <div class="form-group">
         <label for="address" class="col-sm-2 control-label">Address</label>
         <div class="col-sm-10">
         <input type="text" class="form-control" id="address" name="address" placeholder="Address">
         </div>
         </div>
         <div class="form-group">
         <label for="contact" class="col-sm-2 control-label">Contact</label>
         <div class="col-sm-10">
         <input type="text" class="form-control" id="contact" name="contact" placeholder="Contact">
         </div>
         </div>
         <div class="form-group">
         <label for="active" class="col-sm-2 control-label">Active</label>
         <div class="col-sm-10">
         <select class="form-control" name="active" id="active">
            <option value="">~~SELECT~~</option>
            <option value="1">Activate</option>
            <option value="2">Deactivate</option>
         </select>
         </div>
         </div>			 		

   </div>
   <div class="modal-footer">
   <button type="button" class="btn btn-default" data-dismiss="modal">Close</button>
   <button type="submit" class="btn btn-primary">Save changes</button>
   </div>
   </form> 
   </div><!-- /.modal-content -->
   </div><!-- /.modal-dialog -->
</div><!-- /.modal -->
<!-- /add modal -->

<!-- jquery plugin -->
<script type="text/javascript" src="assests/jquery/jquery.min.js"></script>
<!-- bootstrap js -->
<script type="text/javascript" src="assests/bootstrap/js/bootstrap.min.js"></script>
<!-- datatables js -->
<script type="text/javascript" src="assests/datatables/datatables.min.js"></script>
<!-- include custom index.js -->
<script type="text/javascript" src="custom/js/index.js"></script>

</body>
</html>

Copy and paste these codes into your index.php file and navigate to this page. Click on add member button to inspect if the bootstrap modal is working correctly.

5.2 Creating a PHP file to insert the data into the database

In these codes, the insert process happens. Look through the codes and we will go through them afterward:


<?php 

require_once 'db_connect.php'; 

//if form is submitted 

if($_POST) { 
   
   $validator = array('success' => false, 'messages' => array());

   $name = $_POST['name'];
   $address = $_POST['address'];
   $contact = $_POST['contact'];
   $active = $_POST['active'];

   $sql = "INSERT INTO members (name, contact, address, active) VALUES ('$name', '$contact', '$address', '$active')";
   $query = $connect->query($sql);

   if($query === TRUE) {			
      $validator['success'] = true;
      $validator['messages'] = "Successfully Added";		
   } else {		
      $validator['success'] = false;
      $validator['messages'] = "Error while adding the member information";
   }

   // close the database connection
   $connect->close();

   echo json_encode($validator);

}

Let us look at the beginning of the codes, It checks if the form is submitted by using a $_POST global variable. If the form is submitted then it inserts the data into the database and checks if the query is executed successfully. At the end of the query, the built-in json_encode function will pass the result of the action.

5.3 Create an Ajax file to pass the data to the server


<?php 
// global the manage memeber table 
var manageMemberTable;

$(document).ready(function() {
manageMemberTable = $("#manageMemberTable").DataTable();

$("#addMemberModalBtn").on('click', function() {
   // reset the form 
   $("#createMemberForm")[0].reset();
   // remove the error 
   $(".form-group").removeClass('has-error').removeClass('has-success');
   $(".text-danger").remove();
   // empty the message div
   $(".messages").html("");

   // submit form
   $("#createMemberForm").unbind('submit').bind('submit', function() {

      $(".text-danger").remove();

      var form = $(this);

      // validation
      var name = $("#name").val();
      var address = $("#address").val();
      var contact = $("#contact").val();
      var active = $("#active").val();

      if(name == "") {
         $("#name").closest('.form-group').addClass('has-error');
         $("#name").after('The Name field is required');
      } else {
         $("#name").closest('.form-group').removeClass('has-error');
         $("#name").closest('.form-group').addClass('has-success');				
      }

      if(address == "") {
         $("#address").closest('.form-group').addClass('has-error');
         $("#address").after('The Address field is required');
      } else {
         $("#address").closest('.form-group').removeClass('has-error');
         $("#address").closest('.form-group').addClass('has-success');				
      }

      if(contact == "") {
         $("#contact").closest('.form-group').addClass('has-error');
         $("#contact").after('The Contact field is required');
      } else {
         $("#contact").closest('.form-group').removeClass('has-error');
         $("#contact").closest('.form-group').addClass('has-success');				
      }

      if(active == "") {
         $("#active").closest('.form-group').addClass('has-error');
         $("#active").after('The Active field is required');
      } else {
         $("#active").closest('.form-group').removeClass('has-error');
         $("#active").closest('.form-group').addClass('has-success');				
      }

      if(name && address && contact && active) {
         //submi the form to server
         $.ajax({
            url : form.attr('action'),
            type : form.attr('method'),
            data : form.serialize(),
            dataType : 'json',
            success:function(response) {

               // remove the error 
               $(".form-group").removeClass('has-error').removeClass('has-success');

               if(response.success == true) {
                  $(".messages").html('<div class="alert alert-success alert-dismissible" role="alert">'+
                     '<button type="button" class="close" data-dismiss="alert" aria-label="Close"><span aria-hidden="true">&times;</span></button>'+
                     '<strong> <span class="glyphicon glyphicon-ok-sign"></span> </strong>'+response.messages+
                  '</div>');

                  // reset the form
                  $("#createMemberForm")[0].reset();		

                  // reload the datatables
                  manageMemberTable.ajax.reload(null, false);
                  // this function is built in function of datatables;
               } else {
                  $(".messages").html('<div class="alert alert-warning alert-dismissible" role="alert">'+
                     '<button type="button" class="close" data-dismiss="alert" aria-label="Close"><span aria-hidden="true">&times;</span></button>'+
                     '<strong> <span class="glyphicon glyphicon-exclamation-sign"></span> </strong>'+response.messages+
                  '</div>');
               } // /else
            } // success 
         }); // ajax subit 				
      } /// if


      return false;
   }); // /submit form for create member
}); // /add modal

});

The manageMemberTable is initiated as a global variable to call in another function. This concept will be cleared up in the next part. The #addMemberModalBtn click function will clear the input field and inside that function, the #createMemberForm onsubmit function will validate the input field and send the data into the server with the help of Ajax when the form is submitted by users.

6. Retrieve Data

This part is easy, go to the [custom/js/index.js] file, and in that file, we will need to call the [php_action/retrieve.php] file. In this section, there are two steps to fetch the data from the database. Look through the codes and we will go through them afterward:


<?php 

require_once 'db_connect.php';

$output = array('data' => array());

$sql = "SELECT * FROM members";
$query = $connect->query($sql);

$x = 1;
while ($row = $query->fetch_assoc()) {
$active = '';
if($row['active'] == 1) {
   $active = '<label class="label label-success">Active</label>';
} else {
   $active = '<label class="label label-danger">Deactive</label>'; 
}

$actionButton = '
<div class="btn-group">
   <button type="button" class="btn btn-default dropdown-toggle" data-toggle="dropdown" aria-haspopup="true" aria-expanded="false">
   Action <span class="caret"></span>
   </button>
   <ul class="dropdown-menu">
   <li><a type="button" data-toggle="modal" data-target="#editMemberModal" onclick="editMember('.$row['id'].')"> <span class="glyphicon glyphicon-edit"></span> Edit</a></li>
   <li><a type="button" data-toggle="modal" data-target="#removeMemberModal" onclick="removeMember('.$row['id'].')"> <span class="glyphicon glyphicon-trash"></span> Remove</a></li>	 
   </ul>
</div>';

$output['data'][] = array(
   $x,
   $row['name'],
   $row['address'],
   $row['contact'],
   $active,
   $actionButton
);

$x++;
}

// database connection close
$connect->close();

echo json_encode($output);

?>

Firstly, In the above codes, the data is fetched from the database and stored as an associative array. The fetched data is appended into an array variable. At the end of the script, the fetched data is converted into a JSON format. The bootstrap dropdown button which includes the javascript onclick function will be justified in the next part.

Secondly, This is the most important part. We will be using an “Ajax” built-in function of a datatable to retrieve the data from the server i.e. retrieve.php file. To use the Ajax function, we will be writing a bit of code where the datatable function is instantiated. Look through the highlighted code.


manageMemberTable = $("#manageMemberTable").DataTable({
   "ajax": "php_action/retrieve.php",
   "order": []
});

A video demonstration to retrieve a data through datatable function.

7. Remove Member

Go to the index.php file in [datatables_crud/index.php]. The logic is simple. First of all, we’ll create a remove button to pop up a modal with a confirmation button. Secondly, we’ll create a server-side processing script file that will remove the selected member’s information from the database Lastly, submit the form via Ajax.

7.1 Creating the remove modal form

Go to the index.php file and create a pop-up bootstrap modal with a confirmation button inside a form. When the remove button is clicked this remove confirmation modal should be displayed. For now, Copy and paste them into the index.php file after adding the modal code.


<!-- remove modal -->
<div class="modal fade" tabindex="-1" role="dialog" id="removeMemberModal">
<div class="modal-dialog" role="document">
<div class="modal-content">
<div class="modal-header">
<button type="button" class="close" data-dismiss="modal" aria-label="Close"><span aria-hidden="true">&times;</span></button>
<h4 class="modal-title"><span class="glyphicon glyphicon-trash"></span> Remove Member</h4>
</div>
<div class="modal-body">
<p>Do you really want to remove ?</p>
</div>
<div class="modal-footer">
<button type="button" class="btn btn-default" data-dismiss="modal">Close</button>
<button type="button" class="btn btn-primary" id="removeBtn">Save changes</button>
</div>
</div><!-- /.modal-content -->
</div><!-- /.modal-dialog -->
</div><!-- /.modal -->
<!-- /remove modal -->


7.2 Creating the remove.php file

Go to remove.php in the php_action folder. Copy and paste these codes into the remove.php file.


<?php 

require_once 'db_connect.php';

$output = array('success' => false, 'messages' => array());

$memberId = $_POST['member_id'];

$sql = "DELETE FROM members WHERE id = {$memberId}";
$query = $connect->query($sql);
if($query === TRUE) {
$output['success'] = true;
$output['messages'] = 'Successfully removed';
} else {
$output['success'] = false;
$output['messages'] = 'Error while removing the member information';
}

// close database connection
$connect->close();

echo json_encode($output);

?>

7.3 Creating the remove function in Ajax

In this part, create a javascript function as remove member.

[css autolinks=”false” classname=”myclass” collapse=”false” firstline=”1″ gutter=”true” highlight=”” htmlscript=”false” light=”false” padlinenumbers=”false” smarttabs=”true” tabsize=”4″ toolbar=”true” title=”custom/js/index.js”]
// global the manage memeber table
var manageMemberTable;

$(document).ready(function() { …
});

function removeMember(id = null) {
if(id) {
// click on remove button
$("#removeBtn").unbind(‘click’).bind(‘click’, function() {
$.ajax({
url: ‘php_action/remove.php’,
type: ‘post’,
data: {member_id : id},
dataType: ‘json’,
success:function(response) {
if(response.success == true) {
$(".removeMessages").html(‘<div class="alert alert-success alert-dismissible" role="alert">’+
‘<button type="button" class="close" data-dismiss="alert" aria-label="Close"><span aria-hidden="true">&times;</span></button>’+
‘<strong> <span class="glyphicon glyphicon-ok-sign"></span> </strong>’+response.messages+
‘</div>’);

// refresh the table
manageMemberTable.ajax.reload(null, false);

// close the modal
$("#removeMemberModal").modal(‘hide’);

} else {
$(".removeMessages").html(‘<div class="alert alert-warning alert-dismissible" role="alert">’+
‘<button type="button" class="close" data-dismiss="alert" aria-label="Close"><span aria-hidden="true">&times;</span></button>’+
‘<strong> <span class="glyphicon glyphicon-exclamation-sign"></span> </strong>’+response.messages+
‘</div>’);
}
}
});
}); // click remove btn
} else {
alert(‘Error: Refresh the page again’);
}
}

8. Update Member

8.1 Creating update modal form and fetching particular member data

In this part, we are going to get the particular member’s information whenever the edit button is clicked. When clicking that button the editMember function is invoked and it will fetch the member’s information for displaying in the input fields and updating the member’s information.

The logic is simple, In index.js create an editMember method which should accept one parameter namely member id. By using that id it should be able to fetch and display the member’s information with the help of Ajax. As well as we need to create a pop-up modal on the index page i.e. index.php to display and update the member’s information. To do this, we need to write some codes in getSelectedMember.php, index.js, and index.php files.

Firstly, go to the getSelectedMember.php file which is located at [php_action/getSelectedMember.php]. This code will retrieve a particular member’s information from the database by using the particular member’s id. Copy and paste these codes and we will go through them afterward:


<?php 

require_once 'db_connect.php';

$memberId = $_POST['member_id'];

$sql = "SELECT * FROM members WHERE id = $memberId";
$query = $connect->query($sql);
$result = $query->fetch_assoc();

$connect->close();

echo json_encode($result);

?>

In the above codes, the server gets the member id from the $_POST variable. Through that id, the script executes the query and returns the associative data into a JSON format.

Secondly, Go to the index.js file which is located at [custom/js/index.js]. In this file, an editMember method will get a member id and pass it to the server for getting the data. Copy and paste these codes and we will go through them afterward:


// global the manage memeber table 
var manageMemberTable;

$(document).ready(function() {...
});

function removeMember(id = null) { ...
}

function editMember(id = null) {
   if(id) {
      // remove the error 
      $(".form-group").removeClass('has-error').removeClass('has-success');
      $(".text-danger").remove();
      // empty the message div
      $(".edit-messages").html("");

      // remove the id
      $("#member_id").remove();

      // fetch the member data
      $.ajax({
         url: 'php_action/getSelectedMember.php',
         type: 'post',
         data: {member_id : id},
         dataType: 'json',
         success:function(response) {
            $("#editName").val(response.name);

            $("#editAddress").val(response.address);

            $("#editContact").val(response.contact);

            $("#editActive").val(response.active);	

            // member id 
            $(".editMemberModal").append('<input type="hidden" name="member_id" id="member_id" value="'+response.id+'"/>');				

         } // /success
      }); // /fetch selected member info

   } else {
      alert("Error : Refresh the page again");
   }
}


In the above codes, the editMember function requires one parameter as member id. From that id, the function will fetch the member information, display the value in the input field and create a hidden input field with the member id value.

8.2 Submitting the form via Ajax

In this section, when a form is submitted, the onsubmit function is invoked. This function will verify the input field and update the member’s information.

Firstly, go to the [custom/js/index.js] file and copy and paste the highlight codes inside the editMember function as below and we’ll go through them afterward:


function editMember(id = null) {
   if(id) {

      // remove the error 
      $(".form-group").removeClass('has-error').removeClass('has-success');
      $(".text-danger").remove();
      // empty the message div
      $(".edit-messages").html("");

      // remove the id
      $("#member_id").remove();

      // fetch the member data
      $.ajax({
         url: 'php_action/getSelectedMember.php',
         type: 'post',
         data: {member_id : id},
         dataType: 'json',
         success:function(response) {
            $("#editName").val(response.name);

            $("#editAddress").val(response.address);

            $("#editContact").val(response.contact);

            $("#editActive").val(response.active);	

            // mmeber id 
            $(".editMemberModal").append('<input type="hidden" name="member_id" id="member_id" value="'+response.id+'"/>');

            // here update the member data
            $("#updateMemberForm").unbind('submit').bind('submit', function() {
               // remove error messages
               $(".text-danger").remove();

               var form = $(this);

               // validation
               var editName = $("#editName").val();
               var editAddress = $("#editAddress").val();
               var editContact = $("#editContact").val();
               var editActive = $("#editActive").val();

               if(editName == "") {
                  $("#editName").closest('.form-group').addClass('has-error');
                  $("#editName").after('<p class="text-danger">The Name field is required</p>');
               } else {
                  $("#editName").closest('.form-group').removeClass('has-error');
                  $("#editName").closest('.form-group').addClass('has-success');				
               }

               if(editAddress == "") {
                  $("#editAddress").closest('.form-group').addClass('has-error');
                  $("#editAddress").after('<p class="text-danger">The Address field is required</p>');
               } else {
                  $("#editAddress").closest('.form-group').removeClass('has-error');
                  $("#editAddress").closest('.form-group').addClass('has-success');				
               }

               if(editContact == "") {
                  $("#editContact").closest('.form-group').addClass('has-error');
                  $("#editContact").after('<p class="text-danger">The Contact field is required</p>');
               } else {
                  $("#editContact").closest('.form-group').removeClass('has-error');
                  $("#editContact").closest('.form-group').addClass('has-success');				
               }

               if(editActive == "") {
                  $("#editActive").closest('.form-group').addClass('has-error');
                  $("#editActive").after('<p class="text-danger">The Active field is required</p>');
               } else {
                  $("#editActive").closest('.form-group').removeClass('has-error');
                  $("#editActive").closest('.form-group').addClass('has-success');				
               }

               if(editName && editAddress && editContact && editActive) {
                  $.ajax({
                     url: form.attr('action'),
                     type: form.attr('method'),
                     data: form.serialize(),
                     dataType: 'json',
                     success:function(response) {
                        if(response.success == true) {
                           $(".edit-messages").html('<div class="alert alert-success alert-dismissible" role="alert">'+
                              '<button type="button" class="close" data-dismiss="alert" aria-label="Close"><span aria-hidden="true">&times;</span></button>'+
                              '<strong> <span class="glyphicon glyphicon-ok-sign"></span> </strong>'+response.messages+
                           '</div>');

                           // reload the datatables
                           manageMemberTable.ajax.reload(null, false);
                           // this function is built in function of datatables;

                           // remove the error 
                           $(".form-group").removeClass('has-success').removeClass('has-error');
                           $(".text-danger").remove();
                        } else {
                           $(".edit-messages").html('<div class="alert alert-warning alert-dismissible" role="alert">'+
                              '<button type="button" class="close" data-dismiss="alert" aria-label="Close"><span aria-hidden="true">&times;</span></button>'+
                              '<strong> <span class="glyphicon glyphicon-exclamation-sign"></span> </strong>'+response.messages+
                           '</div>')
                        }
                     } // /success
                  }); // /ajax
               } // /if

               return false;
            });

         } // /success
      }); // /fetch selected member info

   } else {
      alert("Error : Refresh the page again");
   }
}

First of all, the edit member function gets the member id as a parameter, and through that id, it retrieves the member’s information. When the users submit the form, the submit function is invoked to verify the input field and update the member information.

This part is simple, we’re going to add the codes to the update.php file to update the member information in the database. Just copy and paste them into your update.php file and we’ll go through them afterward:


<?php 

require_once 'db_connect.php';

//if form is submitted
if($_POST) {	

   $validator = array('success' => false, 'messages' => array());

   $id = $_POST['member_id'];
   $name = $_POST['editName'];
   $address = $_POST['editAddress'];
   $contact = $_POST['editContact'];
   $active = $_POST['editActive'];

   $sql = "UPDATE members SET name = '$name', contact = '$contact', address = '$address', active = '$active' WHERE id = $id";
   $query = $connect->query($sql);

   if($query === TRUE) {			
      $validator['success'] = true;
      $validator['messages'] = "Successfully Added";		
   } else {		
      $validator['success'] = false;
      $validator['messages'] = "Error while adding the member information";
   }

   // close the database connection
   $connect->close();

   echo json_encode($validator);

}

?>

Download Source Code !!!

Download